
We have used our compost ball (click here to see us using it) for almost three years. I love the compost ball for several reasons (one being, I think it's really pretty!), but I'm going to be completely honest with you--it was a bit pricey, and though it makes beautiful compost, it just can't handle the amount of veggie scraps, straw, leaves, and lawn waste that we go through. We needed a place to put our waste, and we needed MORE compost, period!
Googling ideas for pallet compost bins will give you lots of nifty ideas. Some plans will include hinges, covers, and a two-or-three bin system--and those are awesome! But this is the most basic way to do it. It's so basic and easy it's silly. I needed basic and silly, because I had no time. This is just a way to start collecting compostable waste when you need to do it right now.
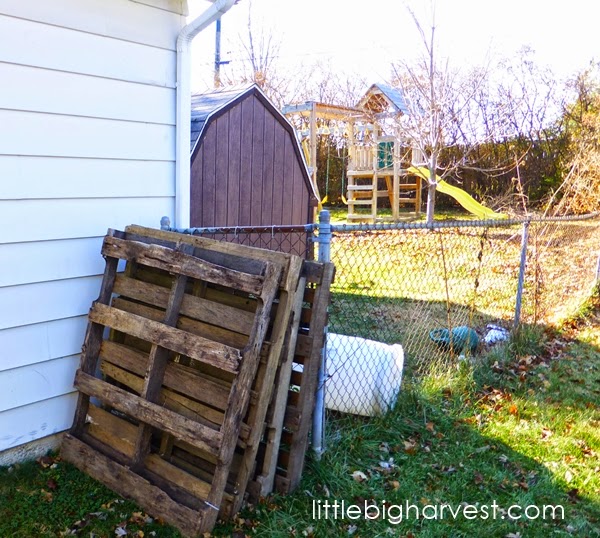
1. Locate pallets. Find 4 of roughly equal size.
Pallets are plentiful and free around here, and I bet they are around you, too. Freecycle is a great place to look, but quite honestly, the easiest thing to do is drive down the alley of a couple businesses. You WILL find unwanted pallets. Go to the front door, ask permission, and the store owner will be very happy to be rid of them--usually the garbage trucks won't take them, and the business is stuck with an unwanted pallet or two just hanging around the alley. I'd been collecting them here and there and stacking them against the fence, trying to figure out where I'd put my compost pile.
 |
| Noah helps me remove an old shrub to make room for compost |
2. Find the perfect place for your compost pile.
This is the hardest part! When you live on a tiny lot, every inch of space is important. You don't want to bother the neighbors (though a properly maintained compost pile will have no smell), and you don't want to cut into precious yard space that you need for living, playing, and growing food.
I thought long and hard about where to build the bin. Initially I thought I'd put in along the north side of the house, since it gets no sunlight and we don't use it for anything else--but it's only a few feet from the neighbor's back patio. I really didn't want to cause them alarm. I settled on a shady back corner of our yard. We had to remove a half-dead shrub, the second hardest part of the job.
Remember, you can always move the bin around later.
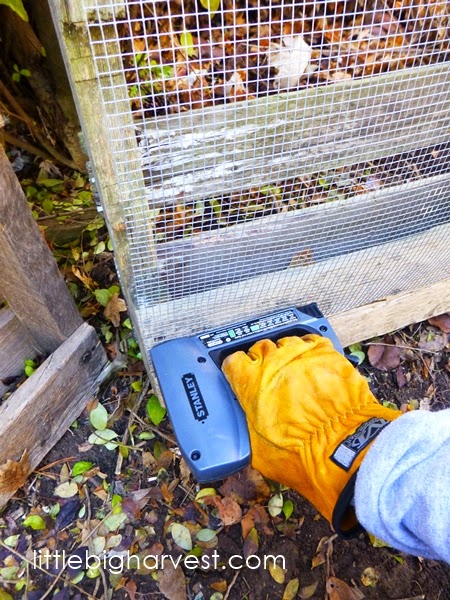
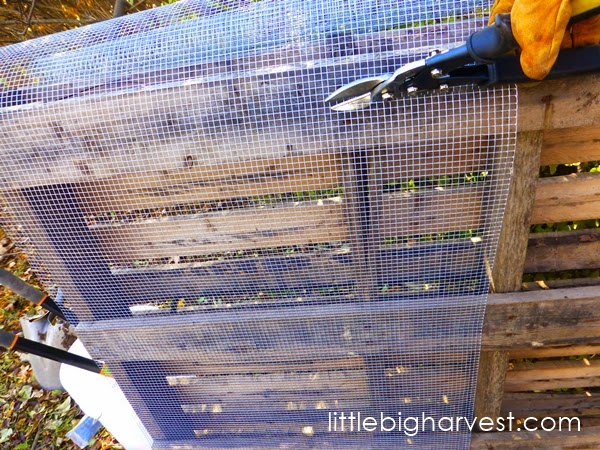
3. Staple hardware cloth to each pallet on what will be the inside surface.
The hardware cloth will act as a barrier, to keep stuff from falling out the big spaces on the sides of the pallets, and to also keep air circulating. If you don't own a staple gun
Cutting hardware cloth is very hard. Unless you have something called tin snips
 |
| This thing is going to hold a LOT of waste! |
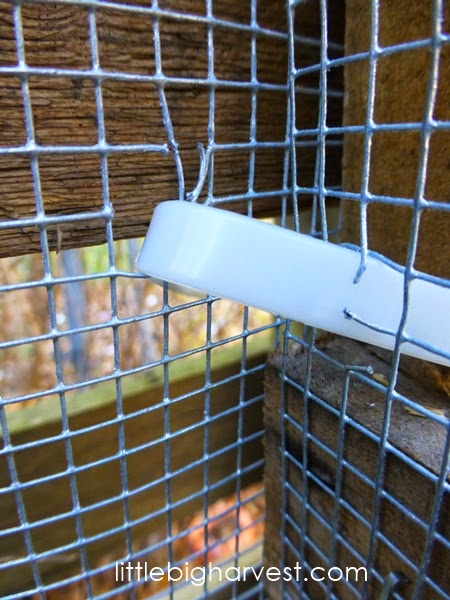
4. Attach the pallets at each side to make a square.
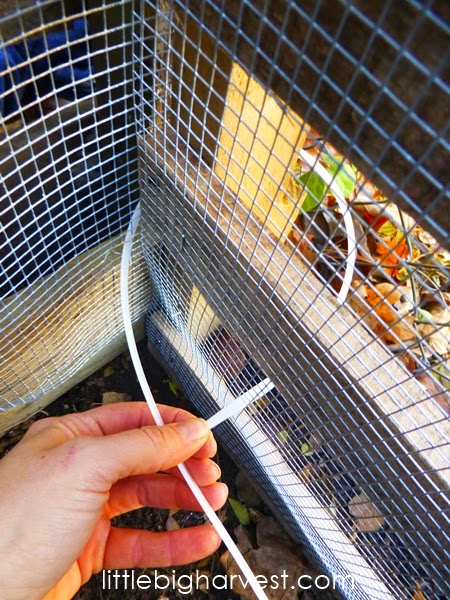
Using the tin snips, we cut holes in the corners of each wall so that we could zip tie the whole thing together. You will want huge zip ties
You can attach your pallets any way you want--wires, twine, screws or nails--I simply took the easiest way out. I find zip ties handy for all kinds of projects. When I need to get into the compost later, I can snip the zip ties in the front to open up the front panel. The hubby suggested using actual hinges for the front, but I was in a hurry to get this bin finished. Plus, I was trying to keep it as simple as possible.
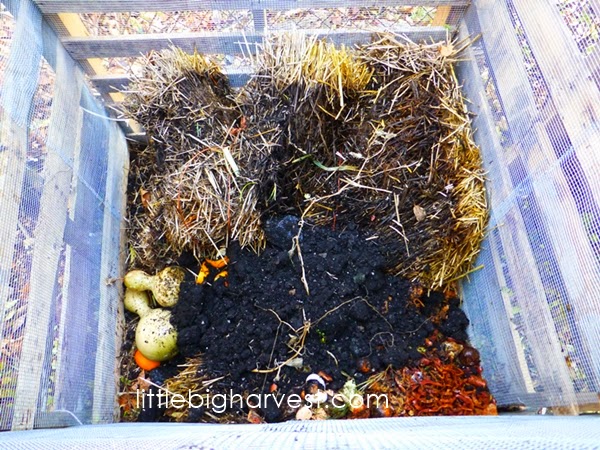
5. Start filling the bin. That's it!
Our simple pallet bin is very close to our play and living space.
We'll see how we manage in the warm months with the
decomposing going on right next to us!
decomposing going on right next to us!

For more DIY compost bins, click here.
*Update 6/3/14 --The bin has been a huge success. As long as we keep brown materials on top, there is virtually no foul smell. It has become an important part of our household green waste management!
*Update 5/21/15 --We added a second bin next to the first, for ease in turning and accessing the finished compost at the bottom. This will help speed up the compost process.

The only things I want to change:
1. Cut the pallets down a bit. The height is just a little too much for us to handle stirring and turning the compost.
2. I still think stapling the hardware cloth down is the easiest way to secure it, but some of the staples have come loose. Simple fix--put in some more staples. :)
DISCLOSURE: This post may contain affiliate links. I'm eligible to receive a small commission whenever a product is purchased through these links. Click Here for my full disclosure!
Planted in the ground, potatoes do take up a great deal of room on your vegetable patio nursery, yet you can simply develop them in compartments or extensive packs. Here is a short manual for planting and developing potatoes in your greenery enclosure.
ReplyDeleteThanks so much for nice post!
ReplyDeleteWould it be beneficial to add worms to this type of compost bin?
ReplyDelete